GUI Junkie
The Icons, They Are A-Changin’
OK, OK, I know I said we would talk about changing both icons and desktops in this month’s column, but it’s simply too much info to cram into one month. So this issue, we’re talking icons.
One of the great features of the Mac OS is the ability to easily change the icons of folders, documents, applications, even those of your hard drive and trash can. In the early days of the Macintosh, the only way to do these things was to haul out your copy of ResEdit and hack the icon resource of said file, even today a scary proposition for most folks.Fortunately, as the Mac OS has grown, so has the ease of which any user can change an icon. If you know how to cut and paste, you can change an icon.
Icon Switcheroo
 One of the ways Mac users personalize their computers is by renaming their hard drives and slapping on custom icons. Since the introduction of OS 8, we have had 3D-ish drive icons, represented by the icon to the right.
Pretty boring, huh? Yes, that will look cool to everyone moving from 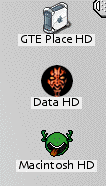 System 7.x to OS 8 or higher, but you’ll tire of it quickly. It’s much more fun to look at something like this (see right).
So how do we go from the one to the other? It’s a very simple process. First, you’ll need an icon to place on your boring ol’ hard drive. For the above “for Darwin ”partition, I have chosen this icon:

Next, click once on the icon you’re going to use to highlight it, then open the Get Info window, either by going to the File menu in the Finder, and selecting Get Info>General Information, or by using Command-I on the keyboard. You will then be presented with the Get Info window for your icon, which will look a lot like this:
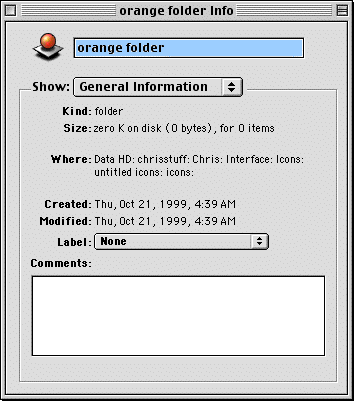
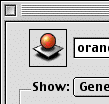 Click once on the icon next to the name, and you will see a box appear around the icon, like so:
Now you need to copy this icon to the Clipboard by going to the Edit menu and selecting Copy. You can also use the keyboard command, Command-C. Close the Get Info window for the icon, and open the Get Info window for the hard drive you want to use the custom icon on.
Once that window is open, click once on the hard drive’s icon, so you see the box around it, just as you did above. Here, you will use the Paste command from the Finder’s Edit menu, or Command-V on your keyboard. This will paste the custom icon from the Clipboard onto the hard drive, and should look like this when you’re done:
Close this window, and you’re done!
Congratulations, you’ve customized a hard drive with its own unique icon. This process will also work for folders, applications, and other files. It is recommended, however, that you not perform this action on your System Folder. You can change the icons within the System Folder, as well as that of the System Folder itself, but it is best to get your feet wet performing these actions on folders and files that are not so necessary to your Mac’s continued survival.
Different Strokes, Different Folks
There are alternative utilities available that can automate the above process. My personal favorite is a freeware contextual menu plug-in from Hide Itoh called, simply enough, Finder Icon. Using Finder Icon, which requires Mac OS 8 or newer, you can simply control-click on the icon you wish to use, select Copy from the Finder Icon sub-menu, then control-click on the item you wish to use the icon with and select Paste.
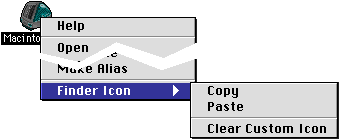
As you can see, you can even use the Clear Custom Icon command to revert to the item’s original icon! Finder Icon is mailware, which means the utility is free to use, providing you let Hide hear your comments regarding it. So if you download and use Finder Icon, let Hide know how much you appreciate his providing this great utility!
iControl, uControl, With This Utility We All Control
Not only do the guys at the Iconfactory turn out some kick-butt icons for you to use on your Macintosh, they code some pretty cool software as well. IconDropper, their first utility, facilitates drag-and-drop icon control. They followed this up with their icon building utility, a Photoshop plug-in named, appropriately enough, IconBuilder.
Their current tour de force, however, is iControl ( reviewed in this issue). With iControl, you can easily change all of your System icons in one go, even the Trash can, or alternatively mix and match System icons as you please. One click reverts them all to their original conditions. It even works with Kaleidoscope to give your desktop interface the look you’ve always dreamed of. Combined with IconDropper, iControl lets you change any icon on your entire system.
Trash ‘n’ Apple
Finally, iMacolor, from our aforementioned friend Hide Itoh, is a handy little freeware control panel that alters the look of the Apple menu and trash can icons.
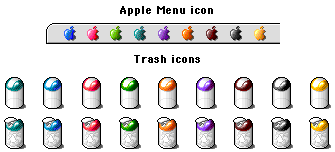
As you can see, you can choose from any of the iMac colors, from the original Bondi to the graphite of the iMac DV Special Edition and the G4 desktop, plus “Java Brown ”for Lombard and Pismo PowerBook users. Curiously, the right-most golden color isn’t available in the control panel.
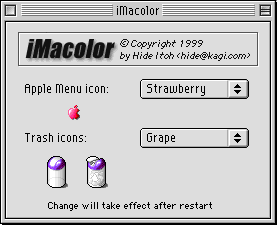
It’s very easy to use iMacolor. Simply choose your preferred color in the pop-up menu for each item, and you get a preview, as shown above. Restart your Mac, and voila! A new colored Apple menu apple and trash can.
 As an added bonus, Hide is nice enough to include iMac icons for use with iMacolor by iMac owners. The iMac icons are up to Hide’s usual high standards, and are offered in a wide range of poses. Alas, they have not yet been updated to reflect the new iMac range, but all of the colors are there, save graphite.
As you can see, there are a myriad of uses for custom icons, from expressing your personality by marking certain folders or files, to just using them as plain ol’ eye candy. One caveat, however, with regard to the use of custom icons: the more custom icons you use, the more your system performance decreases. This rings especially true when rebuilding the desktop (you do rebuild your desktop at least once a week as preventive maintenance, don’t you?). The more custom icons you have, the longer it will take for your desktop to rebuild, so choose your icons and choose them well.
Finally, here is a shot of my iBook’s desktop:
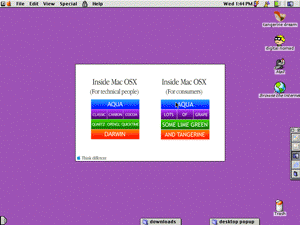
Rather plain, compared to the Star Wars desktop from my G3 mini-tower featured last month, I know, but there is more there than meets the eye. While I am using the standard Apple Platinum theme, there are some slight modifications. The desktop itself is a grape pattern upon which is centered a cute graphic from the eCards section of MacLaunch. My two hard drive icons came from different icon sets I found online. The 32-bit tangerine iBook came from the freebies section of the Philadelphia PowerBook Users Group, PPUG. The Calvin Spaceman Spiff icon came from an unidentified Calvin & Hobbes collection I found while browsing. I’m sorry I cannot point you in the direction from which it came, but there was no Read Me attached to the icons. The Mail and Internet icons come from John Marstall’s excellent Perfect Yosemite collection. Finally, I used Hide Itoh’s iMacolor to change my Apple menu and Trash icons to tangerine, to match my iBook.
Next Month: desktops.
Also in This Series
- Schemin’ and Themin’ · August 2000
- Kill Your Desktop · May 2000
- The Icons, They Are A-Changin’ · April 2000
- Customization · March 2000
- Complete Archive
Reader Comments (4)
Keep in mind, though, that since you said your monitor is small, maybe it's older and is starting to go bad. You say you can't read things on it very well ... is it going fuzzy? It may just be time for a new monitor.
The "lining up your icons" issue should be simple to fix. There is a Finder preference to have icons snap to an alignment grid, or you can hold the Command key to temporarily reverse whatever snap setting (on or off) you have set.
im having a problem.
i cant change my desktop colour,i no it sounds stupid but,it just wont change.every time i click set desktop it stays on mac os default.any ideas?
thanks
Add A Comment