Software Review
Mask Pro 4.1.2

Developer: onOne Software
Price: $160
Requirements: Mac OS X 10.4.8; PowerPC G4; 512 MB RAM; Adobe Photoshop CS2 or Photoshop Elements 4. Universal.
Trial: Fully-featured (30 days).
When building image masks in Photoshop, a very important fact must be understood: even with the best tools at your disposal, building a quality mask can be tedious and require a lot of time. If I’ve learned anything during my evaluations of Mask Pro and competing tools, it’s that there’s no such thing as a one-click procedure. By accepting this truth, I began to better appreciate the difficulty of creating Photoshop tools to help make mask-building as efficient as possible.
Over the years, without a professional masking utility in my arsenal, I’ve become rather skilled at manually building an image mask with careful use of Photoshop’s native tools. However, my best results came from images with simple backgrounds, in which the objects I wished to hold had clearly defined edges. Most of the mask-building tools I’ve tried in recent years also did extremely well with simple backgrounds, but failed to impress with complex backgrounds.
Though I must reiterate that building a quality mask can require a lot of tedious work, Mask Pro has proven itself to me as a champion utility to aid the process.
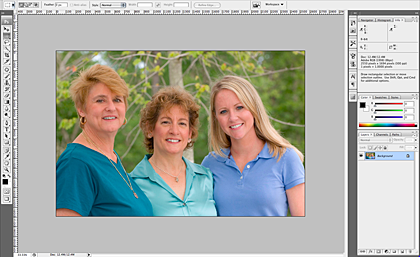
While giving Mask Pro a try, I used the same two photos as with my August review of SmartMask.
This photo should prove to be no challenge for any mask utility.
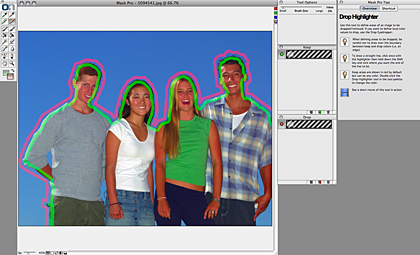
What I immediately noticed with Mask Pro is the very helpful tips window that appears along with the various palettes. Not only do context-sensitive help messages appear for each task, but short videos are also provided to visually demonstrate how to use the selected tool. I learned more about using Mask Pro through these videos than a written user guide could ever hope to teach me.
The thing I liked best about Mask Pro’s interface is that every means of creating the mask is available from the tool palette at any time, unlike SmartMask, which works in one of three modes that largely only work properly in successive order.
With Mask Pro, any style of mask-building can be used at any time on different parts of the image. The Pen tool is great for straight, simple, high-contrast lines such as the arms of the people in the above photo against the blue sky. The Keep and Drop Color Highlighters are good general-purpose tools, while the Keep and Drop Color Eyedroppers are ideal for fine detail areas such as hair or translucent material.
Other masking tools, including SmartMask, attempt to do guesswork for you by specifically recommending a loose contour for the Keep and Drop Highlighters. Mask Pro recommends from the start that the best results for the Highlighters occur when the mask boundary is followed as closely as possible.
Though the Highlighters worked well for me in this photo, I could also have used the Pen tool to isolate the models’ arms and shoulders, then the Highlighters for their heads, and even switch to the Eyedroppers to fine tune wisps of hair, such as the man on the right. But, there’s no need to do it in this order. I could just as easily start with the wisps of hair.
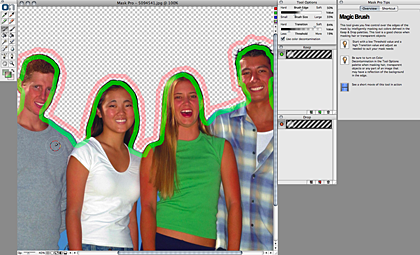
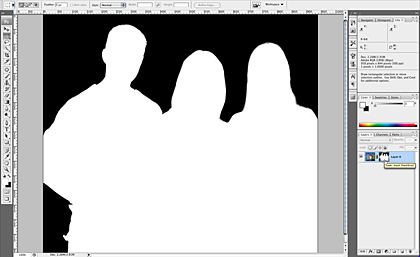
The finished mask for the first photo sample. (Click to enlarge.)
When I was finished, it was clear that I’d built a better mask for this photo, especially around the wisps of hair for the man on the right. For his hair, I used the Keep and Drop Color Eyedroppers to define colors in his hair to keep and the colors of the sky to drop out. Although these tools are generally present in other masking utilities, including SmartMask, none worked for me as well as Mask Pro’s Eyedroppers.
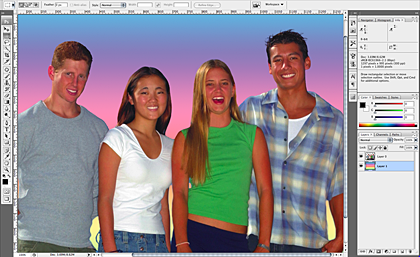
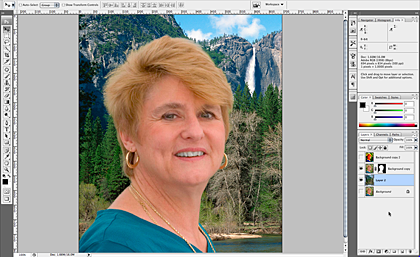
A feature in Mask Pro that is absent in other masking utilities I’ve used is that the results can be held in a standard Photoshop layer mask. In other masking tools, the end result only erases the masked areas from the image’s layer.
Mask Pro can create a true layer mask. Note the mask channel in the Photoshop layer palette.
Admittedly, I thought for a short moment that Mask Pro, like the other utilities I’ve tried, also erased the masked area after accepting the final result. But those helpful videos came to the rescue, and I learned that if I first create a blank layer mask, then invoke Mask Pro with that layer mask targeted, my finished mask translates to that layer mask when I’m finished in the Mask Pro plug-in.
The nightmare photo returns.
Those who saw my SmartMask review will remember how difficult this second photo was and that I largely gave up on it. To be completely honest, my very first attempts with Mask Pro were not remarkably better. However, thanks again to those splendid tip videos, I found a tutorial specifically suited for the kind of problem this photo represents—building a mask when colors in the foreground and background are very similar.
It turns out that the procedure described in the video is only possible because of Mask Pro’s apparently unique feature of supporting Photoshop’s layer masks. The video instructed me to make two copies of the photo layer, then use my favorite method to exaggerate the contrast of the top layer. Once done, I began work in Mask Pro.

With contrast greatly enhanced, the contours of the subjects I wish to mask are better defined and easier for Mask Pro to isolate.
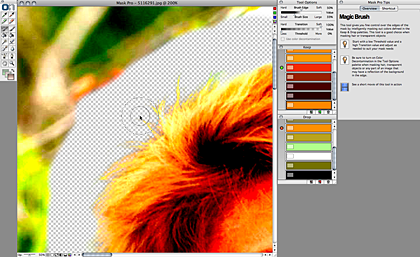
After specifying colors to keep and drop, the Magic Brush tool has a far easier job of removing the drop colors on this high-contrast image.
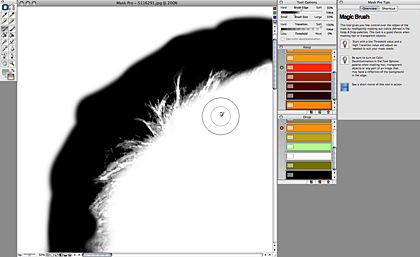
Quick access to view the actual mask helped me visualize exactly what was going on.
After the mask was built, the final steps called for dragging the layer mask from the top layer with the high-contrast photo to the next layer that contained a copy of the unaltered photo. Upon hiding the high-contrast layer, I was left with a very acceptable mask for the original photo. There were a few small places where even the high-contrast version wasn’t clear on the delineation between foreground and background, but because I was left with a layer mask channel, I only needed to target that mask channel and perform some very minor cleaning.
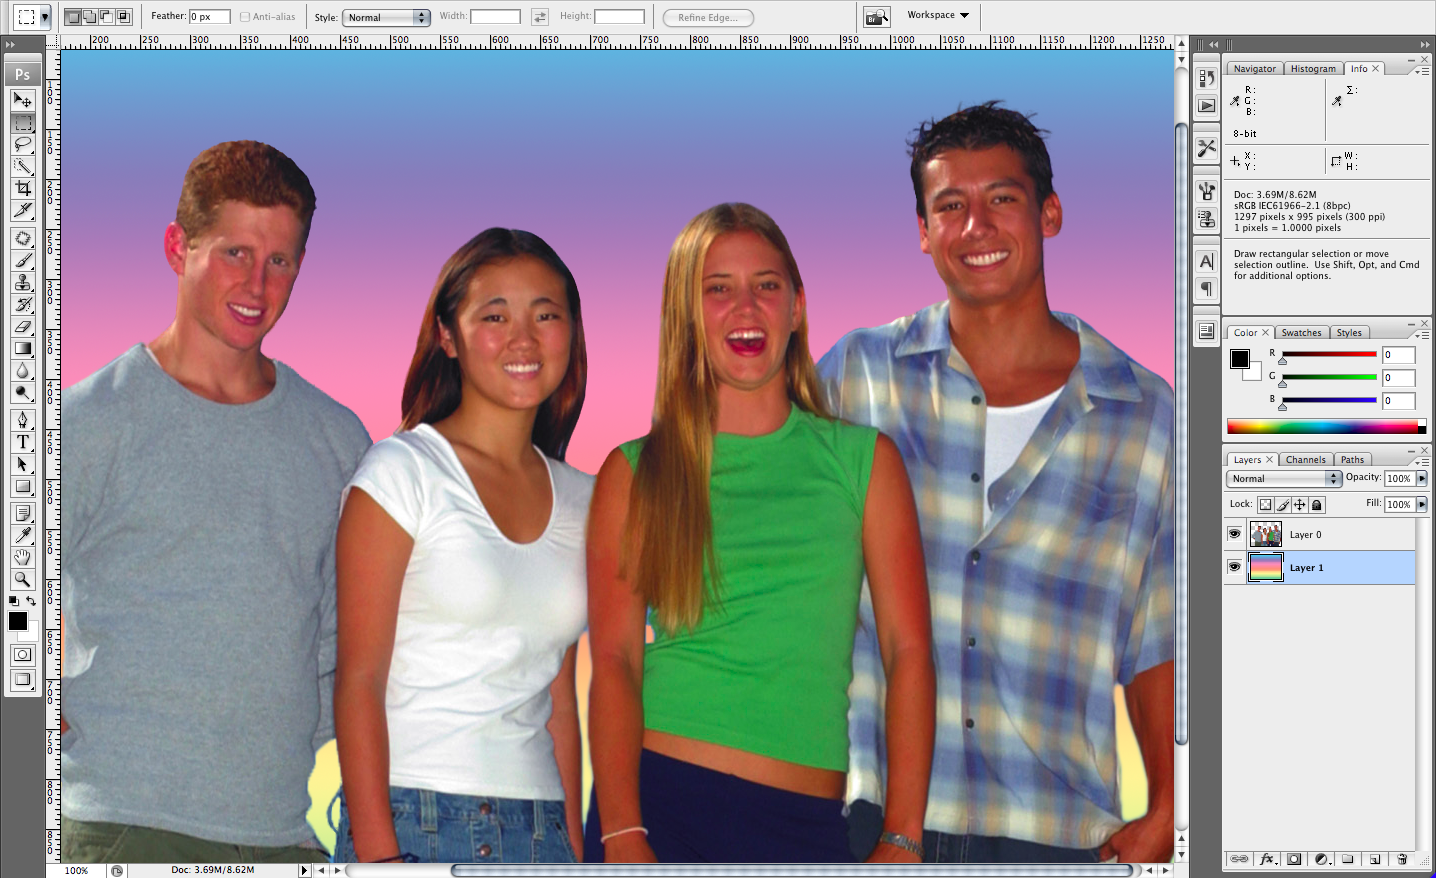
The completed nightmare-photo mask.
Yes, that’s correct, I didn’t take the time to continue masking the other two women in the photo. The high-contrast tip would have worked just as well for the other models, but remember I began this review saying that quality masks on complex backgrounds are tedious even with the best tools. With Mask Pro, I accomplished the above result in about a half hour, and I feel I could’ve spent another half hour or more to make it even better.
Before you think that too much time is required to do this work, think about how long it might take without a professional masking utility. Given the thin wisps of hair, even if I’d spent most of a day working with Photoshop’s native tools, I likely would not have achieved the half-hour results with Mask Pro.
Mask Pro is priced a bit higher than its competitors, but I don’t believe the price is a detriment. Mask Pro truly is a useful utility that will help serious Photoshop artists build quality masks, so long as time is invested to let the software work its magic.
![]() Copyright © 2008 Lee Bennett, lbennett@atpm.com. Reviewing in ATPM is
open to anyone. If you’re interested, write to us at reviews@atpm.com.
Copyright © 2008 Lee Bennett, lbennett@atpm.com. Reviewing in ATPM is
open to anyone. If you’re interested, write to us at reviews@atpm.com.
Reader Comments (2)
with the tools, menus responsible for this action.
Add A Comment