Review: Portraits & Prints 1.0.1

Developer: Econ Technologies
Price: $19.95 (list)
Requirements: Mac OS X
Trial: Feature-limited (no saving, only 4 photos per catalog, can only print once per session).
Last summer, I set my dad up with a digital camera. For the most part, everything went quite smoothly—he figured out how to work the camera, take pictures, and get the pictures onto the computer. Getting the pictures out of the computer proved slightly more problematic. The camera included some basic image editing software, but it was difficult to master and didn’t really offer much in terms of printing options. We eventually broke down and bought Photoshop Elements. Although this program includes easy access to many useful tools, it is probably overkill for what my dad would like to do. I only wish that Portraits & Prints had been available when I was getting my dad started.
Just the Basics
Portraits & Prints bills itself as “a photo printing solution.” This means two things. First, you won’t find any tools for reducing file sizes, creating JavaScript rollovers, or anything like that—Portraits & Prints is solely for editing and printing digital images. Second, you will find everything you need to churn out quality digital images of various sizes.
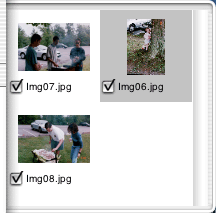
Portraits & Prints uses a catalog model for keeping track of your images. The catalog is a pane attached to the main window, which shows thumbnails of the pictures you’ve added to the catalog. Clicking on a picture brings it into the main area.
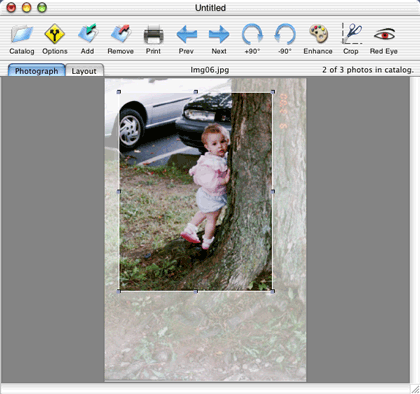
Once the image is in the main area, you can perform some basic image manipulation on it. The first thing you’re likely to do is rotate the picture, if necessary. Since Portraits & Prints is not an image editing application, it doesn’t let you rotate the image freely. Instead, you can rotate clockwise or counter-clockwise, in 90° increments.

Portraits & Prints Catalog Pane

Touching up a Picture in Portraits & Prints’ Main Window
Oftentimes, your picture can end up having too much information in it. For instance, you might have a wonderful picture of your family on vacation. Unfortunately, some idiot decided to join your family for the picture. Instead of throwing the picture away, you can just crop this guy out and forget he ever existed. Unlike some applications, like Photoshop, cropping is not destructive—the portions of the image you cropped are preserved and the cropping can be adjusted. So, when you realize the idiot in your picture is actually your cousin Carl, you can just adjust the crop area instead of starting over from scratch.
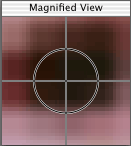
Another bane of the family photographer is red eye—you know, the effect of the flash bouncing off the retina and making the subject of your photo look possessed. Like other applications, Portraits & Prints has a red eye tool. It does an acceptable job of removing red eye, but it can be a little difficult to get just the effect you want. When you choose the red eye tool, you see a magnified view of where your cursor is. The magnified view contains a cross hair that indicates where the red eye correction will be applied. You change the magnification by using the up and down arrow keys. If you don’t get the size of the magnification exactly correct, you will either leave some red eye or “fix” something you didn’t want to change—for instance, I learned it can turn a baby’s skin green. Fortunately, the red eye correction is undo-able, so you can just try again.

The Red Eye Remover Tool
Finally, you can adjust the sharpness, saturation, and brightness of the image. Sharpness lets you control how blurry the image appears, saturation controls the amount of color in the image, and brightness lets you brighten or darken your image. These three can be used to make up for image problems caused by the conditions where the picture was taken.
Along with grouping pictures together, the Portraits & Prints catalog feature provides another important piece of functionality: it stores all of the changes you make to the pictures. When you’re cropping or removing red eye, you’re not actually changing the original image. So, if you make a horrible mistake with the saturation setting and remove all the color from your photo, you don’t need to worry that you’ve lost the original picture forever.
Another nice touch is that Portraits & Prints integrates with Image Capture. When Image Capture downloads the pictures from your digital camera, you can elect to have them added to a new catalog. To accomplish this, you just need to select “Open in Portraits & Prints” from the Automatic Task popup.
Printing Portraits and Prints
No photo printing solution would be complete if you couldn’t actually print. Furthermore, if there were only a single printing option, there would be nothing to set Portraits & Prints apart from the pack. Fortunately, Portraits & Prints does not disappoint in this regard. In fact, Portraits and Prints’ printing options are where the program got its name.
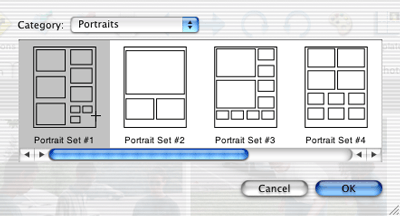
Portraits and Prints includes 12 templates for printing pictures. These templates are broken down into two categories of six templates. The first category is Portraits. Portraits are layouts that contain different-sized pictures on the same page, similar to school pictures from elementary school. The second category is prints. These are layouts where every picture on the page is the same size, one 8"x10", two 5"x7", eight wallets, and things like that.

Selecting a Portrait Layout for Printing
If you want to send the same print to several people, then you’ll only want to include a single photo on the whole template. However, if you want to print out all your pictures, then you’ll likely want to include multiple pictures on the template. Portraits and Prints gives you the option of how you want to fill the layout. Furthermore, you can choose which pictures to omit from the layout, by deselecting their checkboxes in the catalog pane.
Since the layouts are fixed size, it may not be possible for the whole picture to fit into the printable area. Although Portraits and Prints will resize an image to fit into a layout, some cropping will occur if the image’s aspect ratio is different from that of the space in the layout. If this cropping is above 10% of the total image sign, a warning icon is displayed. At this point, you can move the image around inside the layout to decide which region will be printed.
Conclusion
If you own a digital camera and want a simple application to touch up and print your photographs, look no further than Portraits & Prints. This application provides a simple interface to most of the tools you will need, first to make your images presentable and then to present them.
Reader Comments (3)
Add A Comment