Software Review
StoryMill 4.0.1

Function: Novel writing software.
Developer: Mariner Software.
Price: $50 (download); $25 (upgrade)
Requirements: Mac OS X 10.6.
Trial: Fully-featured (30 launches).
“I’m going to write a book.” One of those insane ideas that pops into your head from time to time—most often at three in the morning. Chances are you push it right back out of your head again, but what if you can’t? What if the story is there, begging to be told, and you—writing newbie that you are—have no idea where to start?
You could sit down with a notebook, or open up your favorite word processor, and start writing, but even if you beat the blank page for a while, sooner or later you’re going to get stuck. Maybe you’re having trouble organizing your ideas, or you’re forgetting which character is which, or who did what when. It’s a lot to keep in your head, so you write pages and pages of notes or save multiple files with background stories and character descriptions, and it’s all a great big mess. Isn’t there a program that can keep all that stuff together where you can find it and maybe even help keep it straight?
Actually there are a few of them, and they compete with each other for both novice and experienced writers. I got a chance recently to try out one of them: StoryMill 4.0.
Getting Started
StoryMill offers a couple of options upon launch. In the File menu, you can choose New or “New from Templates.” The “Novel (with submission tracking)” option is probably the best choice. As you’ll see later, this option includes a panel to list agents and publishers, and we have to hope that you’ll find at least a few interested in what you’re writing (once you put in the requisite research and leg work through writers’ groups, conferences, etc.—there are some things that no software can do for you).
Now you have an untitled project. To the left you’ll see a menu listing Novel, Characters, Scenes, Locations, Tasks, Research, and Submissions.
Let’s Take a Closer Look
Novel
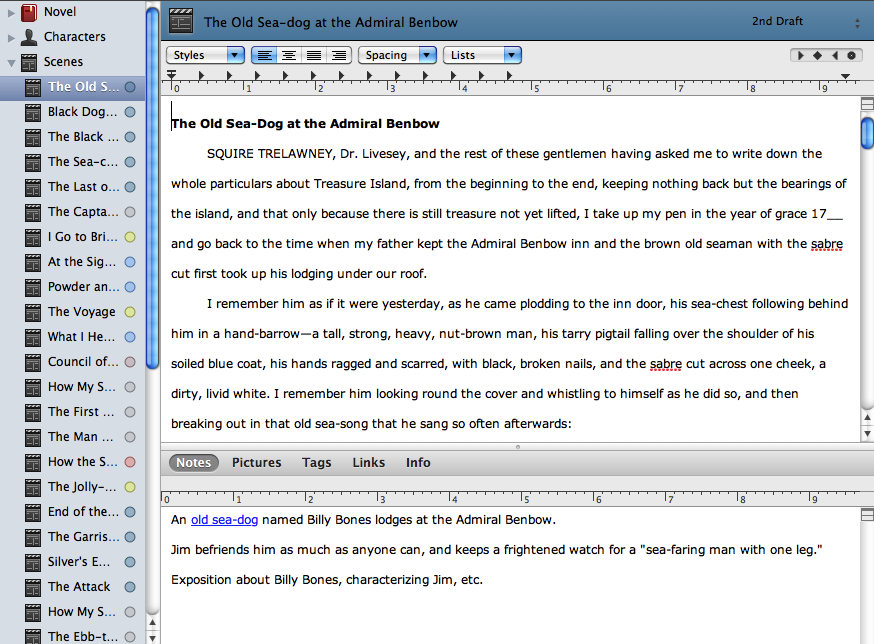
Novel is where you start writing, beginning with Chapter 1—as good a place to start as any. Most writers have a solid idea where they want to begin, even though they’ll probably cut it later on. So far, not really anything beyond what you can do with a word processor.
Scenes
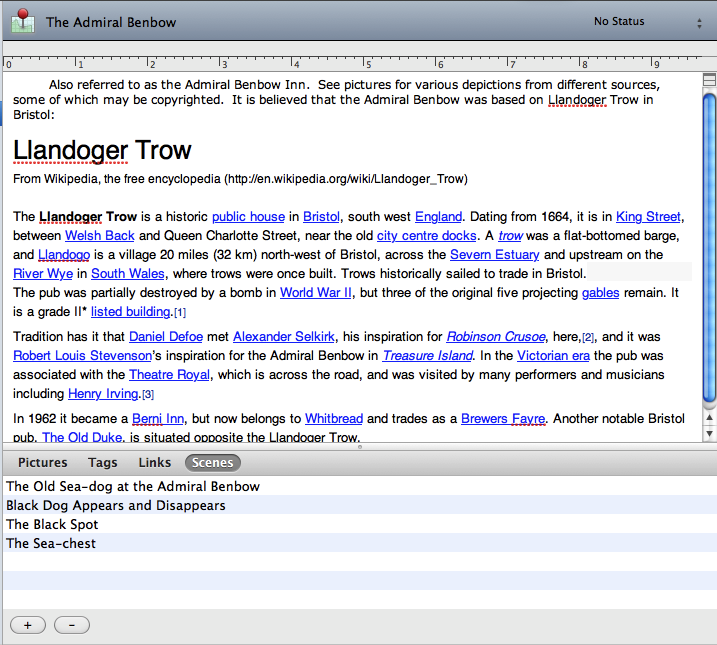
Scenes is a great place to write the pivotal parts of your work as they come to you. Let’s say you’ve got a first act climax, or an interesting plot twist. You’re not sure how to get there, but why wait? Get it out now and find the right place for it later.
StoryMill’s greatest strength is its scenes-based approach to writing. Writing chapter-by-chapter can force you into an overly chronological approach. I know this from personal experience: the first draft of my first manuscript is chronological and chapter-based. I’m not sure if I could have told this story any other way, but looking back I wish I’d had the flexibility to try. Some of the edits and revisions I’m now considering might have come to me more quickly in a scenes-based approach.
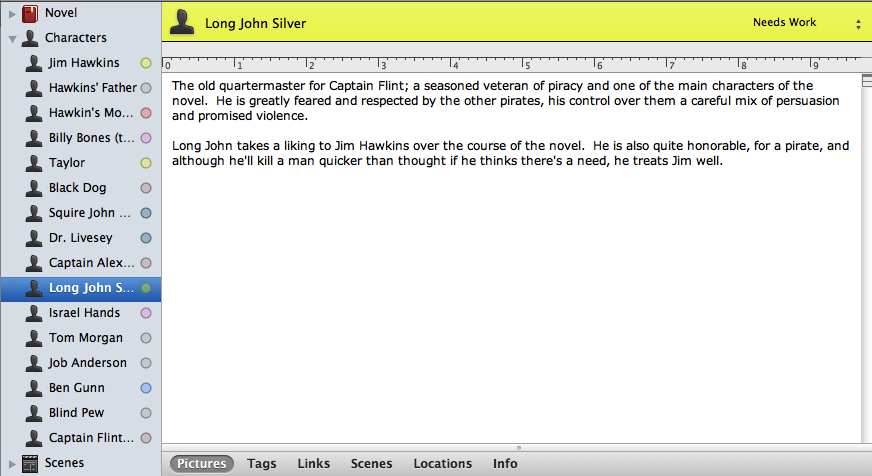
Characters
Characters is where you keep your characters. What they look like, their backgrounds, motivations, all that backstory stuff that you started to put in Chapter One until you realized that you were thirty pages in and nothing had happened yet. Your reader doesn’t need all this information up front, but you do. This is where you keep it until you’re ready to reveal little by little.
Locations
Locations are the setting for your scenes. Here, for example, you can put in all the architectural details of a building without revealing them on page one (boring). Again, what you need to know to write isn’t necessarily what reader needs to know to read (yet).
Tasks
Tasks is a generic tag—kind of a catch-all. You can delete this if you want or make other tags to keep track of things outside the basic categories provided in the template.
Research
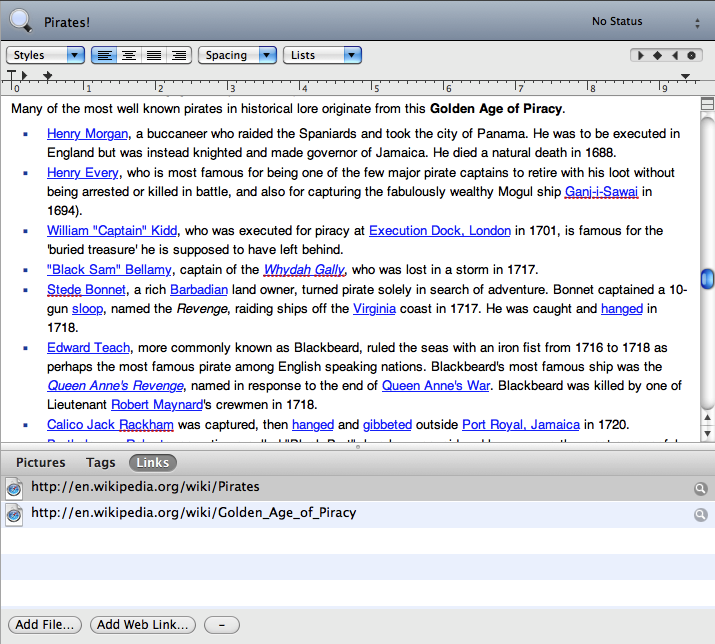
Here’s where you keep all the information that keeps your story “true to life.” Someday (we hope) you’ll be reading your book at a big book signing event. The last thing you need is a self-proclaimed expert questioning you on the breeding and training of quarter-horses, or the fatality rate of American test pilots in the 1950s, or how many bishops attended the First Council of Nicea. No fact is too obscure for some know-it-all to correct, but you can be prepared. Just make sure that any references you find in Wikipedia are properly sourced.
Submissions
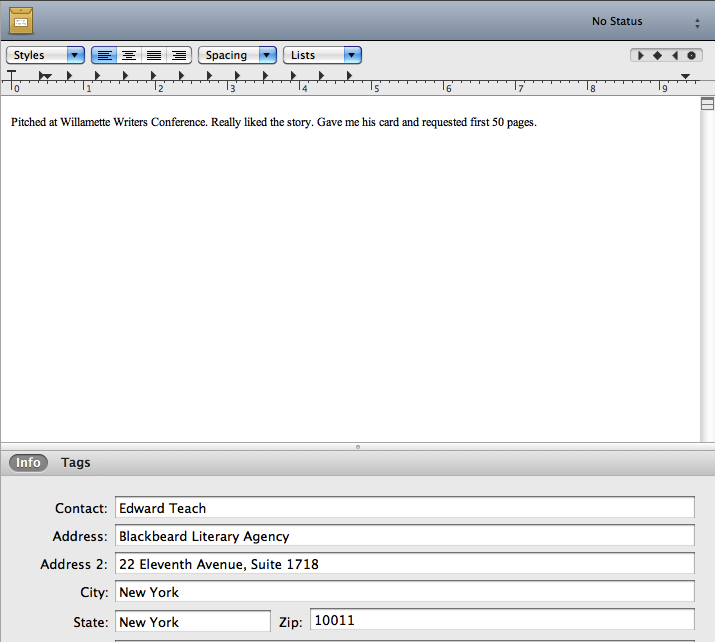
Submissions (as stated earlier) is where you track submissions of your completed and thoroughly edited manuscript to agents and editors. This is also a good place to store contact information prior to submitting, and you can export entries to Address Book to print mailing labels.
Menu options in each window allow you to interconnect characters, scenes, and locations by storyline as well set a draft status (e.g. first, second, needs work, final). These draft statuses can be edited in Preferences.
But Wait, There’s More
Looking across the top toolbar, we see this set of buttons:
Insert
Insert adds a new submenu to the selected menu item on the left. Here’s an easy place to add new scenes, characters, or locations. Another way to do this is by “right-clicking” the menu item, or by selecting the “Add a New _” button at the top of the open window.
Snapshots
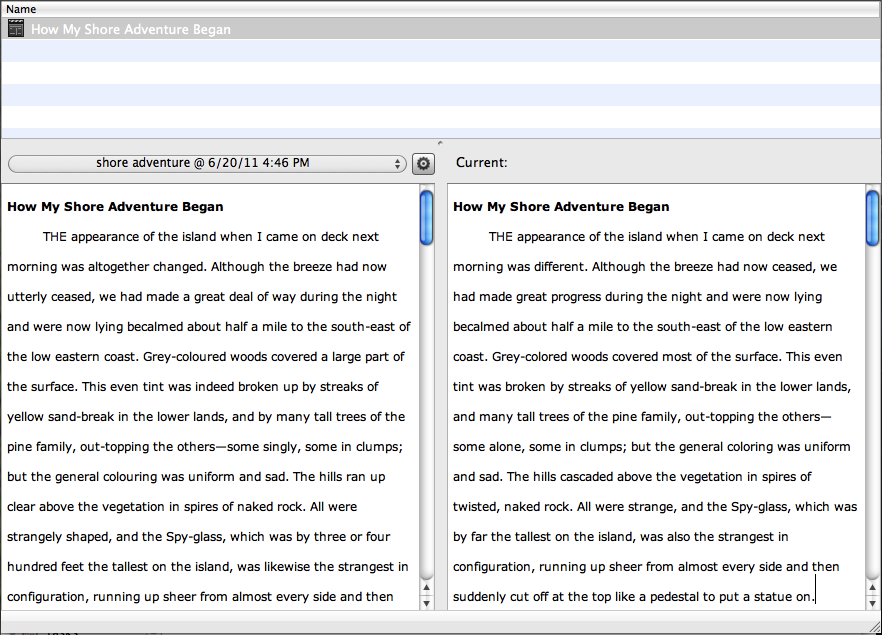
Snapshots is a useful editing feature. You can save any scene as a snapshot, and then compare original and revised scenes side-by-side in a single window. (I’ve done this with two open windows in Word—it’s a real pain).
Full Screen
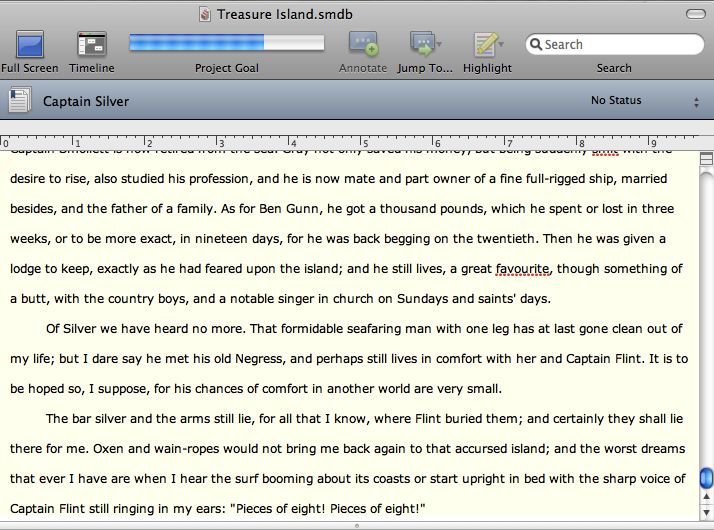
Full screen toggles the view to text only. Select this option if you want to write without on-screen distractions. The Esc key toggles back. The only problem I had with this feature is that, every time I toggled, the cursor jumped back to the beginning of the text. A minor annoyance, but one that should be easily fixed in an update.
Timeline
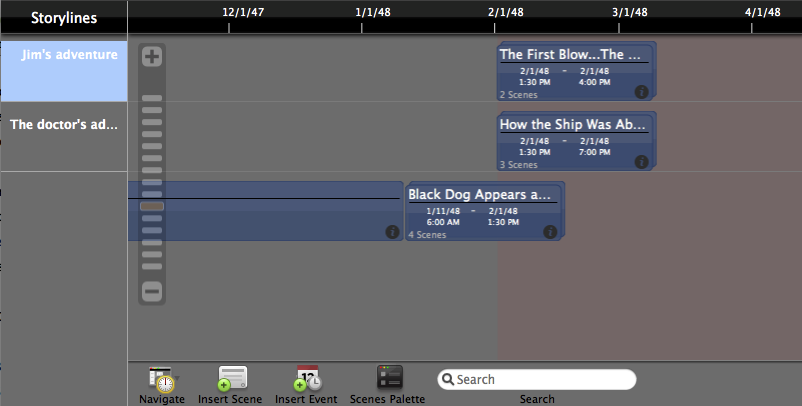
The timeline lets you lay out your entire story chronologically, with overlapping subplots on separate lines. Coming from a music recording background, I love timelines—I sketch them out on big sheets of paper laid out on the floor. The timeline is scalable from hours to centuries—a good feature for stories that vary their treatment of time. Managing a complex timeline can be tricky, though, if, for example, you have one scene that takes place in an hour occurring in the same time frame as a broad setting or transition scene that covers several months. After a while, my eyes started to bug out a bit as I scrolled and scrolled to get to the point where the two overlapped. I’m not sure how to fix this; it may just be a shortcoming of any timeline layout.
Progress Meter
Next to the timeline is the progress meter. I love this. It’s like a less threatening version of Write or Die. Every writer needs to set a goal, or nothing gets done, and having an easy way to set a word limit—“I will write 1,000 words on this scene today if it kills me!”—is a good way to keep from getting distracted from wasting too much time on character traits, setting details, research minutiae, and any other self-imposed distractions that keep us from doing what we’re supposed to be doing: writing.
Importing and Exporting
StoryMill’s file format is proprietary, so the Import and Export features are essential. Import will bring any common word processing file into StoryMill, dividing the chapters as long as they are clearly labeled (e.g. “Chapter One”). It has no clue what to do with prologues, epilogues, or non-traditionally titled chapters.
I tried importing my manuscript-in-progress—a very large file—to see how it did. It divided the chapters correctly but screwed up the formatting. Even if I fixed the formatting, I’d have to add scenes, characters, and locations by hand—not really worth the effort. In this case I think I was expecting more of StoryMill than it was designed to do.
Exporting is straightforward. Select File ‣ Export, choose “Chapter text” in the Template list, select a file format from the pop-up menu on the bottom bar, and click Export.
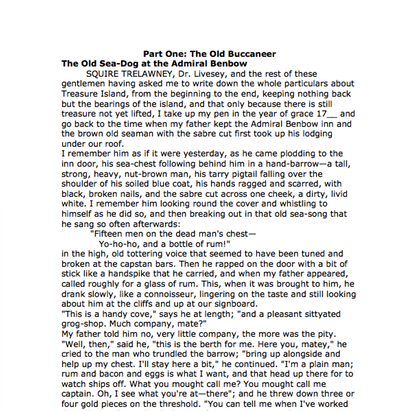
Sorry Mr. Stevenson, We Are Not Accepting Submissions at This Time
Then format in your word processor of choice, because StoryMill defaults to single space with no drop downs at the beginning of chapters and indents on first paragraphs but not subsequent paragraphs. Some of these issues can be fixed in StoryMill ‣ Preferences ‣ Editor, but not all of them—I was stumped on drop-downs—so I’d proof in a word processor before printing anyway.
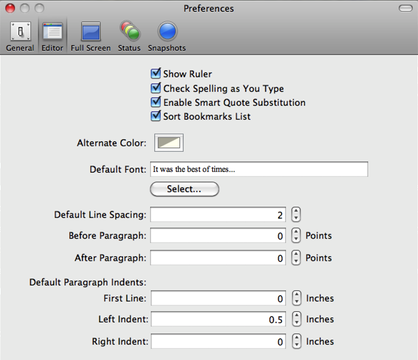
Mr. Dickens, on the Other Hand, Now Has Representation
This is my one complaint about an otherwise wonderful software package. Formatting requirements do vary somewhat from publisher to publisher, but there are some consistent points like double spaced text, chapter titles dropped down about a third of a page, and indenting on all paragraphs except the first one. To have a “novel writing” application marketed to an extent to beginning writers default to slush-pile worthy formatting is unacceptable and just a bit cruel.
And That’s Why I Almost Love It
After spending a long weekend playing with StoryMill, I find it to be a very powerful writing tool, better for fiction than non-fiction, and better for starting from scratch then revising. It has so much in its favor and is a great value for $50, but as much as I want to give it an Excellent rating for everything it can do, I can’t get past the formatting issue. My advice: buy it if you’re looking for a tool to help you get going on a new project, especially if you find yourself wanting to play with chronology and subplot. But be ready to export and edit in word processor before you send it to agents or publishers. Otherwise, you’re wasting both your time and theirs.


Reader Comments (1)
Add A Comment